Showing posts with label SharePoint. Show all posts

Could not load type 'Microsoft.AnalysisServices.SPAddin.ASLinkFilePage' in SharePoint 2013

While trying to create a BI Semantic Model Connection, I got an error as Could not load type 'Microsoft.AnalysisServices.SPAddin.ASLinkFilePage'.
The reason is that the PowerPivot Web Application has not been deployed to the SharePoint Web Application.
We can fix this error by following below steps.
  •  Go to the SharePoint 2013 Central Administration site.
  •  Go to the System Settings section.
  •  Click on Manage Farm Solutions under the Farm Management section.
  • Click on powerpivotwebapp.wsp
  • Click Deploy Solution at the top of the screen
  • In the Deploy To section select your web application from the drop down list and click Ok.

Error in PerformancePoint 2010...


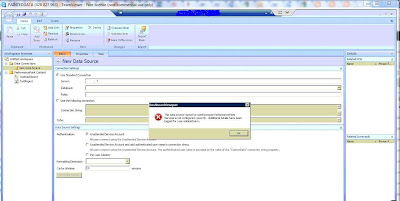
While trying to create a new data source in PerformancePoint 2010 Dashboard Designer, I got an error message as This data source cannot be used because performancepoint services is not configured correctly. The error message is shown in the below figure. I got it after providing the server and while trying to expand the available databases.


This is because that the PerformancePoint is not configured correctly. While configuring PerformancePoint, we need to configure Unattended Service Account. The error occurred due to that account is not configured correctly.
To fix that issue we need to re-configure that unattended service account correctly.
To configure unattended service account, you need a Secure Store Service Key.

Steps to fix the above issue are
  • To generate a secure store service key, go to SharePoint 2010 Central Administration →Application Management → Manage Service Applications → Secure Store Service
  • Then click on Generate New Key
  • Once that is done go to the SharePoint 2010 Central Administration → Application Management → Manage Service Applications → PerformancePoint Service Application
  • Then select Performance Point Service Application Settings
  • In the Unattended Service Account section, enter the user name and password for the account that you want to use as the unattended service account. This is the account that PerformancePoint Service will use to connect to the data source unless you use Per User Identity.
  • Click Ok and if the provided account details are correct, it will be successful.
  • Then go to the Dashboard Designer and try to create the data source again and you will not get that error message.


The URL is not available, does not reference a SharePoint site, or you do not have permission to connect...

When I tried to connect to a SharePoint URL in dashboard designer options, it prompt a message saying "The URL is not available, does not reference a SharePoint site, or you do not have permission to connect"


When I checked the Event Log under Administrative Tools -> Event Viewer -> Windows Logs -> Application, message says that
"Cannot open database "WSS_Content_
GuidOrGivenName" requested by the login. The login failed.
Login failed for user 'domain\username'."

The reason is
that the the Service Account under which the PerformancePoint Service runs, does not have permissions for the SQL Server Content database of the SharePoint Web Application.

To fix this issue , add the domain user which uses to run PerformancePoint services as the database owner of the Content database of the web application (
WSS_Content_GuidOrGivenName).

After that you will not get that message...

Failed to create the configuration database in SharePoint 2010 Configuration Wizard

When I was trying to run the configuration wizard in SharePoint 2010, I got a error message saying
"Failed to create the configuration database
An exception of type System.InvalidOperationException was thrown. Additional exception information: This implementation is not part of the windows platform FIPS validated cryptographic algorithms"


The reason is in the system registry FIPS is enabled.
In the registry there are three keys which are related to FIPS.

1. HKLM\SYSTEM\ControlSet001\Control\LSA\FipsAlgorithm
2. HKLM\SYSTEM\ControlSet002\Control\LSA\FipsAlgorithm
3. HKLM\SYSTEM\CurrentControlSet\Control\LSA\FipsAlgorithm

Set the value for all the keys as "0" to disable FIPS.

Then re-run the configuring wizard after deleting the created tables related to SharePoint in the SQL Server Database.

It works for me and configuration was completed successfully.

Programmatically Set Audience to a SharePoint 2010 WebPart

To provide permission to a sharepoint web part for specific SharePoint Group, we have to use AudienceManager as shown below

SPWeb currentSite = SPContext.Current.Site.RootWeb;
SPSite spSite = currentSite.Site;

SPServiceContext sc = SPServiceContext.GetContext(spSite);

AudienceManager am = new AudienceManager(sc);

Microsoft.SharePoint.WebPartPages.SPLimitedWebPartManager mgr = null;
mgr = currentSite.GetLimitedWebPartManager("SitePages" + "/" + page, System.Web.UI.WebControls.WebParts.PersonalizationScope.Shared);
foreach (System.Web.UI.WebControls.WebParts.WebPart webPart in mgr.WebParts)
{
if (webPart.Title == "WebPartTitle")
{
//Get the Existing Audience for the Web Part
string audWebPart = webPart.AuthorizationFilter;
//If there is no Audience for the Web Part just add it
if (audWebPart == "")
{
webPart.AuthorizationFilter = ";;;;" + NewAudience;
}

//If already Audiences are exist for the Web Part then append new Audience
else
{
webPart.AuthorizationFilter = audWebPart + "," + NewAudience;
}

mgr.SaveChanges(webPart);
lblMessage.Text = "Succeeded...";
}
}


If we just set the value for AuthorizationFilter property, then the existing Audiences will be overwritten.
To avoid it first we have to check whether already audiences exists for that web part. If so we have to append it.

The SharePoint Server 2010 framework requires that three kinds of values be separated by a pair of semicolons (";;"). Multiple values for global audiences and SharePoint groups are delimited by commas, and multiple values for distribution lists are delimited by newline characters ("\n"). Therefore in the above example we used ";;;;" to provide valid string to the AuthorizationFilter property.

Retrieve SharePoint 2010 Permission Levels to a ASP.NET DropDownList

Below code shows how we can get the SharePoint permission levels and assign it to a ASP.NET DropDownList (drpPermissions)

drpPermissions.AppendDataBoundItems = true;

SPWeb currentSite = SPContext.Current.Site.RootWeb;


SPRoleDefinitionCollection permissionColl = currentSite.RoleDefinitions;

foreach (SPRoleDefinition permission in permissionColl)
{

drpPermissions.Items.Add(permission.Name.ToString());
drpPermissions.DataBind();
}

Issue with SharePoint Designer 2010...

While working with dashboard pages, a problem was identified.
First a dashboard page was published to a SharePoint 2010 site using PerformancePoint.
That page includes a SQL Server Report and a PerformancePoint Filter was applied for it. After publishing it to the SharePoint Site, the SharePoint page was opened using SharePoint Designer 2010.
Then some modifications for the layout of the page was done and saved it. But when I opened the page in the browser and tried to view the report, that PerformancePoint Filter was not applied for the report.
The issue is when we save the page using SharePoint Designer, the mapping between the report and the filter was lost.
To apply the filter we have to manually do the mapping.

Redirect to a Different page from a Web Part Zone in SharePoint

Recently I had a problem with redirect to an another SharePoint page.
The problem was when I try to click on a Report publish from the PerformancePoint, it opens the redirected page in the same zone, not in the same window.
To overcome that I used a javascript. The approach I used was, have .aspx page which contains the javascript to redirect to the requested url and call that .aspx by passing a parameter when the report is clicked. The aspx page is located in the Root of the PPSMonitoring site. You can find the path of the Root folder by right clicking on the PPSMonitoring site in IIS and select Explore as shown below.


Then add the redirect.aspx page (according to my sample) which contains the below code.


What this javascript do is it gets the parameter passed by the clicked page and set the redirected url. Then it set the parent page url as the redirecting page url. The reason to set the parent url is that when the request comes from a Zone, it consider the Window as the Zone. Therefore we have to set the redirecting url to the Parent page url.

Enabling Java scripts and Ajax in IE for Windows Server 2008 R2

I had a problem while run the PerformancePoint Server 2007 Dashboard Designer using Internet Explorer in Windows Server 2008 R2. That is the Run button and the Go button are not visible for the Dashboard Designer page.
Also I had some problems for the SharePoint Server 2007 in the same OS and with the same browser. In sharepoint, those javascripts were not working.

Those errors occurs due to the security settings provided by the OS.
To solve those issues go to the Server Manager.
Then as shown in the below figure, you can find Configure IE ESC under the Security Information.


Click on it and select Off form those selections as shown in the below figure.


Then click Ok and check your sites.
It will works...

Easy way to Customize MOSS 2007 Master Pages using SharePoint Designer 2007

Using SharePoint Designer 2007, you can easily customize your SharePoint Master pages. If you want to create a new master page you can easily do it. To do that first copy the default.master page and rename it to whatever name you want (Master page can be found at "C:\Program Files\Common Files\microsoft shared\Web Server Extensions\12\TEMPLATE\GLOBAL").
Then go to the your SharePoint site and go to Site Settings. Click Master Pages under Galleries category and upload the renamed master page to the Master pages.

Then open the SharePoint Designer 2007 and click on the Open Site in the File menu.
Then copy the url of the your SharePoint site and open it in SharePoint Designer 2007. You can see the master pages of the site in the catalogs folder. Double click on the renamed master page to edit in SharePoint Designer.

Then you can customize that page according to your requirments. If you want to remove some parts in the master page, the best thing is comment those code instead of deleting those in the design mode. The reason is if we delete those in design mode it gives errors in the design mode or when we publish them.

After customizing the page click on Save. If you want to set the customized Master Page as the default master page, righ click on it and select "Set as Default Master Page".

That's all. After that you can use the customized master page for other SharePoint Web Applications too.

Problems occur while creating new Web Application in MOSS 2007

  • When you try to create a new application using SharePoint Central Administration, sometimes "Reset Internet Information Services" may be disabled. It might be due to the "Windows SharePoint Services Administration" service is not started. After starting that service the mentioned service should be enabled.
  • Also after insalling and configuring MOSS 2007, when you try to create a new web application using SharePoint Central Administration by clicking OK button in the new web application page nothing will happen. To overcome that issue, you have to add the SharePoint Central Administration site to the Local Intranet using the Internet Explorer.

Publish a browser-enabled form to a SharePoint 2007 form library using MS Office Infopath 2007

To publish a MS Office InfoPath form with browser enabled feature, there are some requirements need to be satisfied. First one is the Form services should be installed on the server. Then the Form services should be activated on the site or site collection which contains the form library. If those two requirements are satisfied, then we can publish a browser enable form to SharePoint 2007 library using below procedure.

First we need to change the Form Library Settings. We can change that settings as required using below steps.

  1. Go to the Form Library to which you published the InfoPath form template.
  2. Click Settings on the Form Library menu bar and choose Form Library Settings from the drop-down menu.
  3. On the Customize page under the General Settings category, click Advanced settings.
  4. On the Form Library Advanced Settings: page under the Browser-enabled Documents category, choose Display as a Web page.

The reason to change that setting is, if the InfoPath client application has been installed on a PC, it will be used by default to open forms that have been stored in a Form Library unless the setting Display as a Web page has been set on that Form Library. This setting will force forms to open in a browser even if the InfoPath client has been installed on the PC from where the form is being opened.


Most probably this will do our task. But there may be a situation where the administrator has disabled the setting to Render form templates that are browser-enabled by users from SharePoint Central Administration. In such a situation even though a form template has been forced to open in a browser through the Form Library setting as discussed in above or not, users will not be able to open InfoPath forms in a browser.

To overcome that issue we have to enable the Render form templates that are browser-enabled setting by using below steps

  1. Open SharePoint Central Administration.
  2. Click the Application Management tab.
  3. On the Application Management page under the InfoPath Forms Services category, click Configure InfoPath Forms Services.
  4. On the Configure InfoPath Forms Services page under the User Browser-enabled Form Templates category, check Render form templates that are browser-enabled by users.

After completing those steps you can publish MS Office InfoPath 2007 form to SharePoint Form Library with browser enabled feature.

Unable to edit my information using “My Settings” link in the SharePoint Site

We can find two links at the top of the SharePoint site as "My Settings" and "My Site". But I was unable to edit my information using "My Settings" link. Also when I clicked on "My Site" link it displayed an error message saying that cannot create a site because site is already created. Other users also had those two problems

I was able to solve those two problems by changing the "My Site Settings" from SharePoint 3.0 Central Administration. User Name in "My Site Settings" was changed to the Domain Users as shown in the below figure.


By changing User Name to Domain Users, it allows every user in the domain to create and maintain for him or her and maintaining his or her own profile. My Site Settings is appearing in the created Shared Service page

Creating a Sample Custom Web Part for SharePoint

We have to create custom web parts for SharePoint sites according to our requirements. Because web parts required for a site may not available in the Web Part Gallery of the SharePoint.
I created a simple web part which displays who the current user is logged in to SharePoint. To create and use it in SharePoint site below steps were used.

• Created a Class Library project in Microsoft Visual Studio 2005
• Then the below code is added to get the current user and show it

public class SimpleWebPart : WebPart
{
private string displayText = "Hello World!";

[WebBrowsable(true), Personalizable(true)]
public string DisplayText
{
get { return displayText; }
set { displayText = value; }
}

protected override void Render(System.Web.UI.HtmlTextWriter writer)
{
writer.Write(displayText);
}
}

• Assembly.cs file in the class library project was modified by adding below code
[assembly: AllowPartiallyTrustedCallers()]


• Then gave a strong name to the assembly by selecting project properties and then selected “Signing” tab as shown in below figure.


• Found the public key token of the Assembly by using a Reflector tool. To find the public key token of the assembly, drag and drop the compiled assembly in to the reflector. Then it shows the public key token of the assembly as shown in below figure.


• Then I located the dll file in the bin folder. The MOSS 2007 creates every portal in the inetpub\wwwroot\wss folder. The easiest way to find the bin folder from these folder hierarchies is to go from inetmgr console. Locate the appropriate portal (for which u want to deploy the web part), identified with the port number. Right click and have Properties. Under the Home Directory Tab, note the path in Local path text box as shown in below figure.


• Right clicked on the project name in the VS.Net 2005 IDE and clicked properties. Under the Build page paste the same path copied from inetmgr console into the Output Path as shown in below figure.


• Then created a new SafeControls entry for the created web part assembly by modifying the web.config file in the bin folder. The code is given below.

<SafeControls>
.
.

.
<SafeControl Assembly="NewWebPart" Namespace="NewWebPart" TypeName="*" Safe="True" / SafeControls>

• To add the created web part to the web part gallery of the SharePoint site first clicked on the “Site Actions” button and then select Site Settings as shown in
below figure


• On the “Site Settings” page under Galleries column clicked on the “Web Parts” as shown in
below figure.


• On the “Web Part Gallery” Page clicked on the “New” button, to add the new web part assembly to the gallery as shown in
below figure.


• On the “New Web Parts” page locate the created web part is in the list, checked the check box on the left and clicked on the “Populate Gallery” button the top of the page as shown in
below figure.


• Then we can add the created web part to a web part zone.

SharePoint Search

I had a problem in SharePoint Search. That when I tried to search content, even though data is available no result was displayed. To overcome that problem below step were used.

* Clicked on the "Search Settings" which is in the created Shared Service page as shown below.


* Then clicked on the "Content sources and crawl schedules" in Configure Search Settings as
shown below


* After that opened the content source's context menu by left clicking the down arrow and
selected "Start Full Crawl" to index all files. This would start the indexing process. Figure is
shown below.


* After that SharePoint Search works correctly.

Creating a Custom Web Part for SharePoint 2007

To create a Custom WebPart you can follow following steps

* In this part you will create a WebPart which displays Current User.
* Create a class libraray using MS Visual Studio 2005
* Then following codes are added which use to show current user.
*

public class SimpleWebPart : WebPart
{
private string displayText = "Hello World!";

[WebBrowsable(true), Personalizable(true)]
public string DisplayText
{
get { return displayText; }
set { displayText = value; }
}

protected override void Render(System.Web.UI.HtmlTextWriter writer)
{
writer.Write(displayText);
}
}

* Then you have to modify
AssemblyInfo.cs file by adding following coding

[assembly: AllowPartiallyTrustedCallers()]

*
Give your assembly a strong name. Just go into the Project
Properties and then go to the "Signing" tab to do this.
Alternatively, you can use the sn.exe command line tool to generate strong names
for you.


*Find the public key token for your assembly. An easy way to this is
to use a standard tool such as
Reflector. Once the DLL is compiled and built, drag and drop it
in Reflector. It should show you the public key token, along with the details
* Locate the SharePoint Web application in which you want to deploy this WebPart. You can do this via the IIS Manager under administrative tools.

*
Drop the DLL in the _app_bin directory in the virtual directory. By doing this, you effectively allow ASP.NET to access the DLL. You still need to take a few more steps for SharePoint to use that assembly.

*Then
under the same virtual directory, find Web.Config and add the following to the SafeControls section.
Assembly="MYWebPart,
Version=1.0.0.0, Culture=neutral,
PublicKeyToken=sfcvdsxbf7305ec3"
Namespace="MyWebPart"
TypeName="MySimpleWebPart" Safe="True" />

These values may differ from your values such as PublicKeyToken, Namespace,...

*
With Web.Config modified, you have to add the WebPart to the gallery. Through
your browser, go to the Web application whose virtual directory you have been
using. Once on that site, go to Site Actions -> Site Settings -> Modify
All Site Settings

*
Under that, click on "Web Parts" under Galleries

* Click on "New" in the toolbar, and find the MyWebPart.MySimpleWebPart

* Check the checkbox, go to the top, and click on "Populate Gallery". You should
see the MySimpleWebPart.webpart file ready to use in your site

* Then you can add this WebPart wherever you want.


Important Notes:

* Modify the web.config file using "Microsoft Visual Studio 2005 Tools for
Application", do not use WordPad.
* If You are working on a machine where SharePoint is not installed,
then you have to copy some .dll file from the machine where SharePoint
is installed.
Path for those .dll files is
"
Local_Drive\Program Files\Common Files\Microsoft Shared\Web Server Extensions\12\ISAPI"
* We have to add some additional Namespaces for our application.
* For the class file (Class1.cs) we have to add "using System.Web.UI.WebControls.WebParts;"
* For the Assemly.cs file we have to add "using System.Data" and "using System.Security;" namespaces

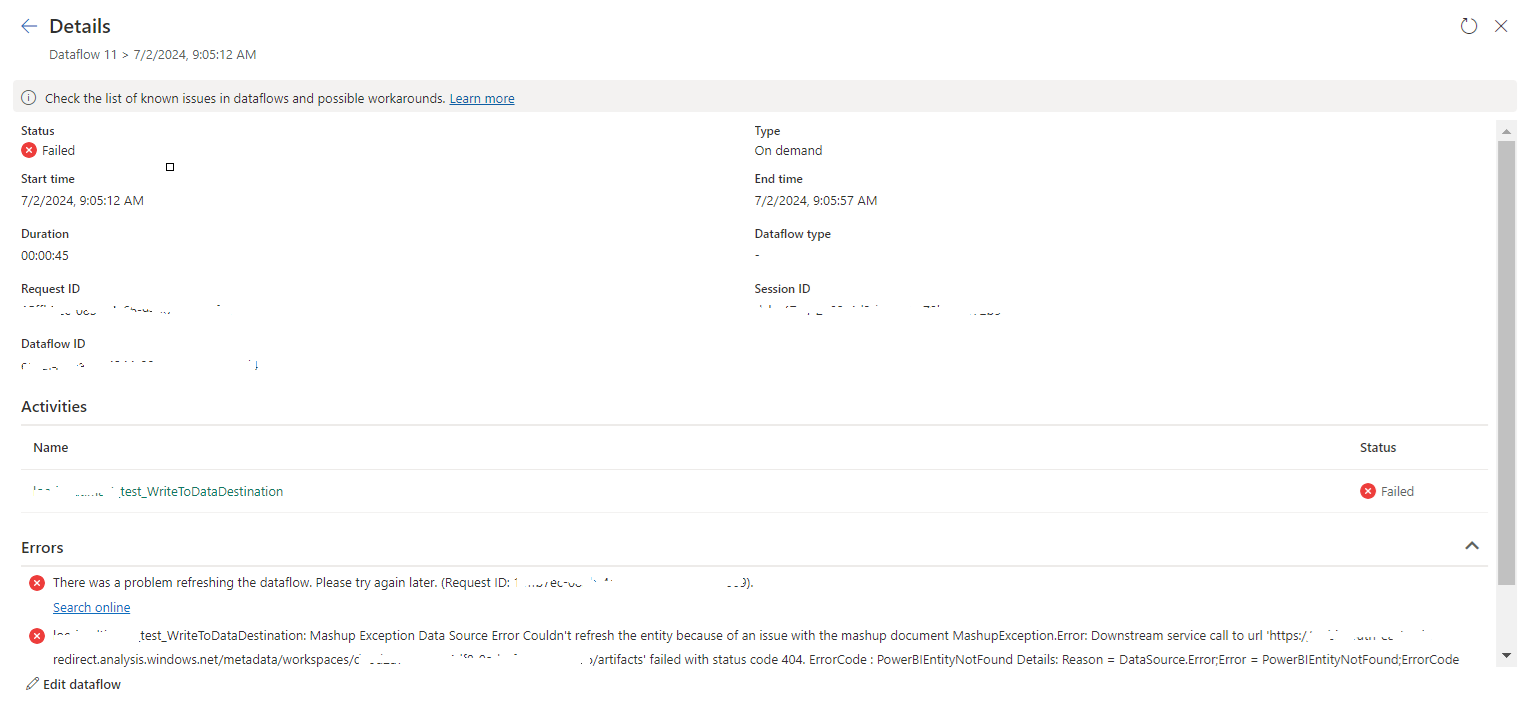
tablename_WriteToDataDestination: Mashup Exception Data Source Error Couldn't refresh the entity...

 Once a Dataflow is created and published on Fabric, got the below error while refreshing the Dataflow. tablename_ WriteToDataDestination: M...