Hosting ASP.Net Site in IIS in Windows Server 2008 R2

I am posting this post since I had some problems while hosting a site in IIS in Windows Server 2008 R2.

To add a web site in IIS, right click on Sites in the IIS Manager and select Add Web Site as shown in the below figure.


Then you will get the Add Web Site window as shown below and enter the required details.


Physical Path should be the folder which contains the web site files and it should locate inside the C:\inetpub\wwwroot\wss\VirtualDirectories folder.

Then click Ok to complete it.
But if you try to browse the site, it will give you an error.

To avoid it and browse the web site you need to do two things.
First one is, add the IIS_IUSRS and allow full permission. To do it right click on the site and select Edit Permission as shown in the below figure.


Then go to the Security tab in the new window and add the IIS_IUSRS user and allow Full Control. Then click Ok.

Still you cannot view the page because of an authorization error.

To avoid it you need to do the second thing.
Select the site and you will get a screen as below.


Then double click on Authentication and you can see enabled authentication types. In that Windows Authentication is displayed as Disabled. Right click on it select Enable as shown in below figure.


It will fix the authentication error and you will be able to browse the web site...

Increase Virtual Hard Disk Size in Hyper-V

In some situations we may need to increase the virtual hard disk size.
We can increase the size of the disk by using Edit Disk under Actions in the Hyper-V Manager.

Then you will get a window as shown below.


Select Expand from it and click Next.


Then add the New Size as shown below and click Next.


Then you will get a Summary as shown below and click Finish to complete it.


But you cannot use that increased space straight away. When you start the Virtual Machine, previous disk size will be avilable. To add the increased capacity, go to the Disk Management window by right clicking Computer and by selecting Manage. Then right click on the partition and select Extend Volume as shown below.


Then you will get the Welcome screen as shown below and click Next.


Then you will get the Extend Volume Wizard. Give the amount to be increased as shown below and click Next.


After that you will get the final screen as shown below.


Click Finish to add that disk space.

Connect to IBM DB2 Database Using Toad

We can use Toad to explore the DB2 Database Structures. Before using Toad we need to configure IBM DB2. To configure it open the Configuration Assistant as shown in the below figure.


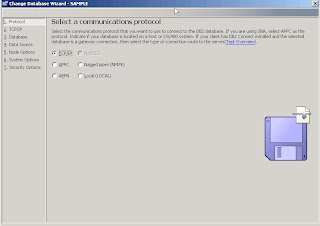
Then you will get a window as shown below. Select TCP/IP as the Protocol and click Next.


After that we have to provide the details of the Host and the Service.


Insert those information and click on Retrieve button to get the Port Number.


Then follow the instructions as shown in below figures.


Then launch the Toad for DB2 as shown in the below figure.


After that create a new connection right click on the Connection Manager and select Create as in the below figure.


Then you will get a window as shown below.


You can see the available databases in the Database alias.


Then provide login details and the category.

How to run UPDATE/INSERT/DELETE Statements on Azure SQL Database in Microsoft Fabric Notebook...

You can run UPDATE/INSERT/DELETE Statements on Azure SQL Database in Microsoft Fabric Notebook using Python SQL Driver - pyodbc.  For the Fa...